What Gets Merged
When you merge accounts, the following information from your old account will be preserved:- All exam attempts - Every exam you’ve taken
- Grades and scores - All your exam grades and results
- Group memberships - All groups you were part of
- Exam history - Complete record of your exam participation
- Student answers - All your submitted answers
How to Accept an Invite and Merge Your Account
-
Receive the Invite
You’ll receive an email invitation from your instructor or organization. The email will contain a link to accept the invite.
If you don’t have access to the email address mentioned in the invite, contact your instructor to update your email address.
-
Click the Invite Link
Open the invite email and click on the “Join now” or “Accept” button in the email.
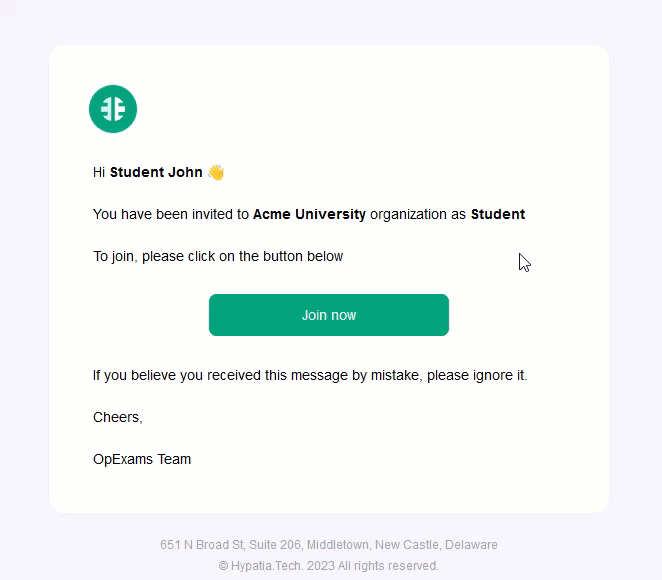 This will redirect you to the OpExams platform.
-
Logout if Prompted
If you’re currently logged into OpExams with your no-email account, the system will detect this and prompt you to logout. Click the logout button when prompted.
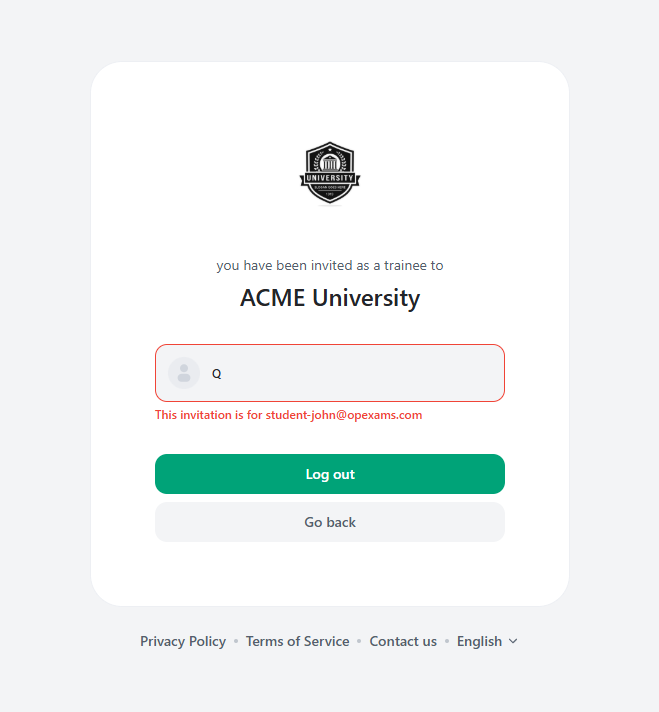 Important: After logging out, you must create your account in the same browser tab. Do not open a new tab or navigate away, as the system needs to remember your old account ID to merge your data. The system will automatically redirect you to the account creation page.
 -
Sign Up or Login with Email
After logging out, you’ll be automatically redirected to the account creation page with your organization’s information pre-filled. Stay in the same browser tab and create an account or login using the email address from the invite.
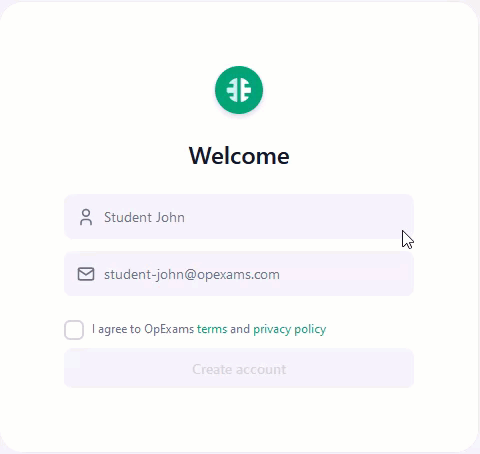 If you already have an OpExams account with this email, simply login. If not, create a new account using the email address.
Do not open the invite link in a new tab or close this browser tab. The system needs to track your old account ID through the URL, which is only available in the same tab where you logged out.
If you already have an OpExams account with this email, simply login. If not, create a new account using the email address.
Do not open the invite link in a new tab or close this browser tab. The system needs to track your old account ID through the URL, which is only available in the same tab where you logged out. - Account Merge Happens Automatically Once you login or sign up with the email address, OpExams automatically detects your previous no-email account and merges them together. All your previous data (exams, grades, groups) will now be associated with your new email account.
-
Verify Your Data
After the merge is complete, verify that all your information is present:
- Check your exam history
- Review your grades
- Confirm your group memberships
Important Notes
The account merge happens automatically when you login or sign up with an email address that matches an invite. You don’t need to do anything special - just follow the normal invite acceptance process.
If you’re already logged in with a no-email account when you click the invite link, the system will automatically detect this and prompt you to logout. After logging out, you’ll be automatically redirected to create an account with your organization’s information. You must complete the signup process in the same browser tab - do not open a new tab or navigate away, as this will prevent the account merge from working.
Troubleshooting
I Can’t See My Old Exams After Merging
If you don’t see your previous exam data after merging:- Make sure you logged out before accepting the invite
- Verify you completed the signup process in the same browser tab (didn’t open a new tab or navigate away)
- Verify you used the exact email address from the invite
- Contact your instructor or OpExams support if the issue persists
The System Says I Need to Logout
If you see a message prompting you to logout:- Click the logout button as instructed
- Stay in the same browser tab - do not open a new tab or navigate away
- The system will remember your old account ID and automatically redirect you to create an account with your organization’s information
- Sign up or login with the email address from the invite in the same tab
If you open the invite link in a new tab or close the browser tab after logging out, the system will not be able to merge your old account data. You must complete the entire process in the same browser tab.